In this tutorial, we are going to talk about how to install SportsDevil on Kodi. This article I am writing by testing on Kodi 18.3. And this article on SportsDevil works well for Kodi 18.3/18.2 Leia and Kodi Krypton 17.6.

This article on install SportsDevil on Kodi will be applicable to all Kodi devices including Amazon FireStick, iOS & Android mobiles, Windows & Mac.
For all the sports lover, SportsDevil is the top Kodi add-on. So far, we have talked about a lot of top Kodi add-ons. You may check how to install Ares Wizard on Kodi and how to install Kodi no limits magic build articles as well.
For all the major sports across the world like the NFL, NBA, NHL, English Premier League, Cricket, Soccer, Hockey, UFC, SportsDevil streams all these games.
There was times when SportsDevil was considered as best Kodi add-on for sports. But now it is not that popular but still SportsDevil streams all the major sports event.
You can watch videos in different video qualities like 480p, 720p, and 1080p. And this top Kodi add-on is able to stream all these for free.
Installing SportsDevil on Kodi can be done in 2 ways-
- You can directly by installing the repo from the source path
- Or you can download the zip file
We have discussed both these methods to install SportsDevil on Kodi on all major devices.
Contents
How to install SportsDevil Kodi Addon on Firestick and PC
SportsDevil is a top Kodi addon and can be downloaded from the various repositories like Kodil, Colossus, Ares, SimplyCaz, and many more.
For this particular tutorial, we are going to use the Kodil repository. But you can use any other repository as you want.
SportsDevil installation Prerequisites
As we are going to use the third party apps and so you need to enable the unknown source in your Kodi source. Follow this guide to enable Kodi unknown sources.
Step-1: Open Kodi
Launch Kodi on your device you are using: Apps> Kodi

Step-2: Open Setting
On the top left corner you will find a gear icon. Click on that icon to open the setting.
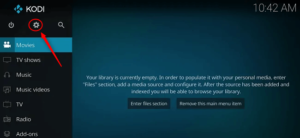
Step-3: Enable unknown sources
This will take you through a new page where you need to select “Add-ons” from left sidebar. This will give you an option to enable the unknown source. By default, developers have disabled this option.

Step-4: Open File Manager
Now go one step back and you will find multiple icons. Select and open “file manager”
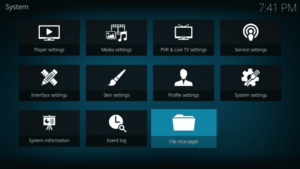
Step-5: Open Add Source
In this step, select the option Add source option as shown below-

Step-6: Add repository address
Once you will select “Add Source”, it will take you through a pop up. Select <None> from that dropdown. Then it will ask you to share the repository address. Here enter http://www.lvtvv.com/repo/ and click OK.
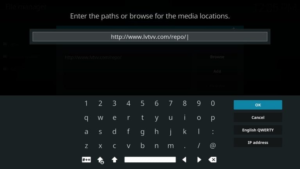
Step-7: Name that repository
Here you will find a popup where you need to put the media source name. Name this media source as “Kodil” and then click ok. I suggest you to match your details as shown below-

Now the repository will be downloaded. From here move to the home window and select Add-ons option from left sidebar.
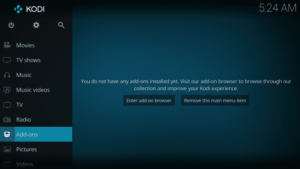
Step-9: Select package installer
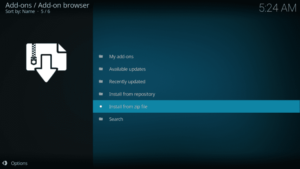
Add-ons will take you to a new screen where you’ll find a new icon at the top left corner. Select that option to open package installer.

Step-10: Install from Zip file
Here you will find multiple option and from there select “install from zip file”
Step-11: Select the zip file
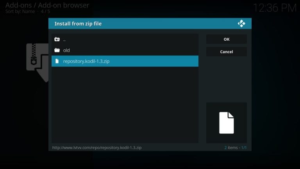
Install from zip file option will give you a new window. Here select the name you provided for media source. We gave the name as “Kodil”. Then it will show you a folder having few items. You will find a file with the name repository.kodil-1.3.zip. Select that zip file.
Step-12: Select Install from repository
This will start the installation of Kodi repository. The installation may take a few moments usually in seconds. Now again go to a step back and then select “install from repository” option instead of “install from zip file”.

Step-13: Select SportsDevil now
Now click to open Kodil repository and then select Video add-ons. Here you’ll find various options and scroll below to find SportsDevil. Here select SportsDevil from the list.

Step-14: Install SportsDevil
The earlier step will take you to a new window where you just need to select Install option. You might get a few warnings here, ignore those and select Yes. This will start the installation.

Step-15: Enjoy SportsDevil
Once installation process will get completed, go back to Add-ons menu. Here find SportsDevil app and open it. Now enjoy the amazing sports on your Firestick TV or PC.

This was the simplest and most popular way to install SportsDevil. This method to install SportsDevil on Kodi will work on all devices including Firestick and PC.
We have one more method and considerably short to install SportsDevil on Kodi. But this method won’t work on Firestick.
How to install SportsDevil Addon on Kodi using zip file
Follow the below steps to install SportsDevil addon on Kodi by downloading the zip file.
Step-1: Download the repository file
Download the zip file from the following link and remember the location where it has been downloaded- http://www.lvtvv.com/repo/repository.kodil-1.3.zip
Step-2: Select Add-ons
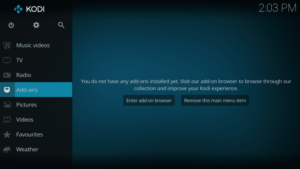
Now open Kodi app on the system you’re using and open “Add-ons” from the left sidebar
Step-3: Open package installer
Again select the package installer icon from the top left corner and open it

Step-4: Select install from zip file option
Here select “Install from zip file” and then a pop up will appear where you need to select the zip file you downloaded in step-1.
This will automatically install Kodil repository on your Kodi application. Once installation will get completed, you will get a success message at the top right corner.
Step-5: Select install from repository option
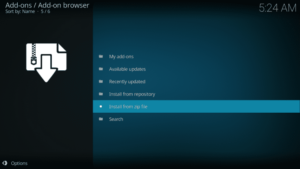
Again move back to step-3 and select “install from repository” option from the list

Step-6: Open video add-ons
Here select Kodil repository and then select Video add-ons

Step-7: Select SportsDevil
Now simply scroll below to find SportsDevil from the list and select it.
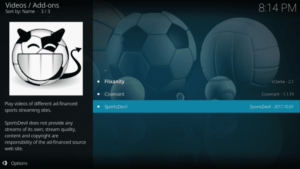
Step-8: Enjoy live channels
This has successfully installed SportsDevil on your Kodi and you can start enjoying all the major sports channels.

This way you can easily install SportsDevil addon on Kodi for all the versions and all Kodi devices.
Many a time, we have heard from the users that SportsDevil Installation Failed. Let’s try to find some reasons and answers to SportsDevil Installation Failed.
Solution to SportsDevil Installation Failed
There can be various reasons why SportsDevil Installation Failed. I have tried to list all those possible reasons why SportsDevil Installation Failed.
- Check your internet connection. For installation of SportsDevil addon we should have working internet connection
- There can be some issue with the repository like the repository is not accessible. And so, if the internet is working but repository is down, try another method to install SportsDevil on Kodi as explained above.
- If both are fine, try restarting your device and Kodi both. This should resolve SportsDevil Installation Failed problem
Conclusion to SportsDevil Installation
These were all about how to install SportsDevil on Kodi 17.6/18.x versions. You can use these steps on all Kodi devices as the Kodi UI is same for all the devices.
Leave a Reply